Operating Actions
This section will teach you how to operate the Actions by getting familiar with navigating Actions and then animating a Property. Before you begin:
Go to Main Menu > Windows > Nodegraph/Actions
Click on the ACTIONS button on the bottom-right corner
To create a new action:
Click on the ➕ icon or NEW ACTION button to reach the Actions UI.
Navigating
RealityHub offers various navigation methods to help you quickly navigate the Actions:
Adding a Property to Timeline: To add a Property to the Timeline:
Select a node
Go to the Properties panel, and find a property you want to animate/trigger
Left-click over the Node Property Menu circle and select the Timeline
Expanding and Contracting Time Ruler: Scrolling up or down on your mouse wheel over the Time Ruler contracts or expands it.
Adding Keyframe: Left-clicking on the Node Property Menu circle inside the Timeline adds a keyframe to your Property/Function.
Get Value: Reads the current value of the property from the Engine.
Removing Property: Left-click on a Property or a Function inside the Action panel and select the Remove option deletes it.
Action Timeline Reset: ⏪ This button resets the position of Action Timeline to frame zero.
Playing: ▶ Plays your action.
Animating a Property
RealityHub’s approach to animating is unique and is easy to understand. In this section, we will be animating a USERTRACK node’s USERTRANSFORM property.
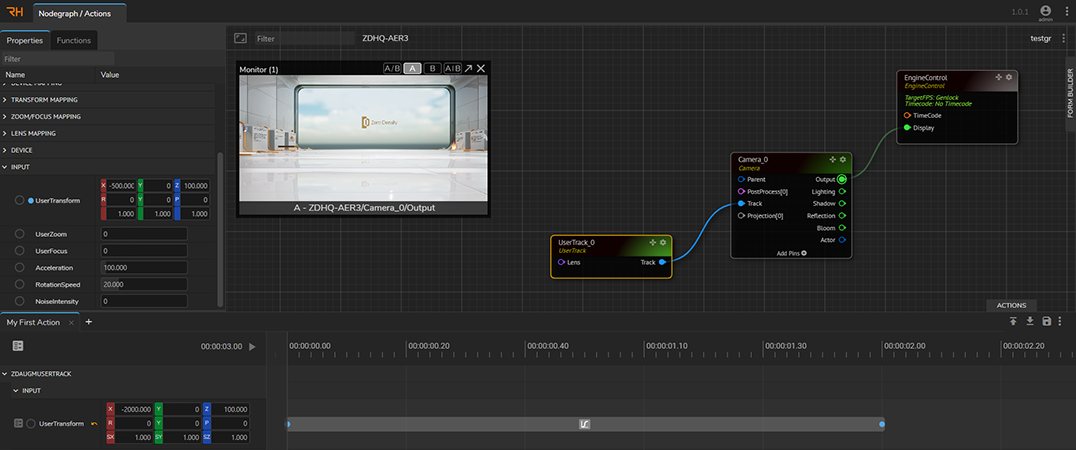
Add the following nodes to your Nodegraph View:
CAMERA node from the UE Camera Node Class
USERTRACK node from the Tracking Node Class
Make the following connections:
ENGINE CONTROL node’s DISPLAY input pin to CAMERA node’s OUTPUT pin
CAMERA 0 node’s TRACK input pin to USERTRACK 1 node’s TRACK pin
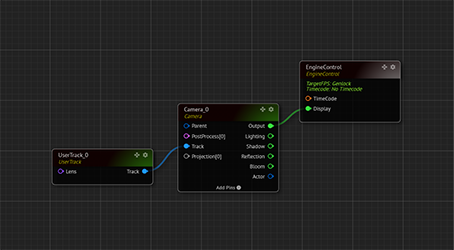
Your RGRaph should look like the image above.
Now:
Click on the ACTIONS button, and open the Action Panel; click on the NEW ACTION button.
Go to the CAMERA node’s OUTPUT pin, right-click and assign the Monitor - 1 to Channel A
Select the USERTRACK 1 node from the Nodegraph, go to the Properties panel, find the USERTRANSFORM property under the Input
Left-click on USERTRANSFORM property’s menu circle, select the Timeline
Go to the first frame by moving the Timeline Slider handle
Go to USERTRANSFORM property inside the Action panel, left-click and select Add Keyframe
Go to the 4th second, change the Y (Position) value to 500 and then change the Y (Yaw) value to -50
Add another keyframe to the USERTRANSFORM
While your last keyframe is selected, go to the Keyframe Interpolation, select the EaseOut and click PLAY