MOS Module Configuration
This section assumes that you are using Octopus Newsroom as your NCS solution. For integrating your system with other 3rd parties that support MOS, don’t hesitate to get in touch with our Support Department.

The image above shows the default MOS Module Configuration interface on RealityHub.
Adding a MOS Device
To fine-tune the RealityHub MOS Module:
Go to the MOS Module and select the Configuration
Click on the ➕ icon to Add a new NCS Device

As soon as you click on the Add button, RealityHub adds a default NCS Device.
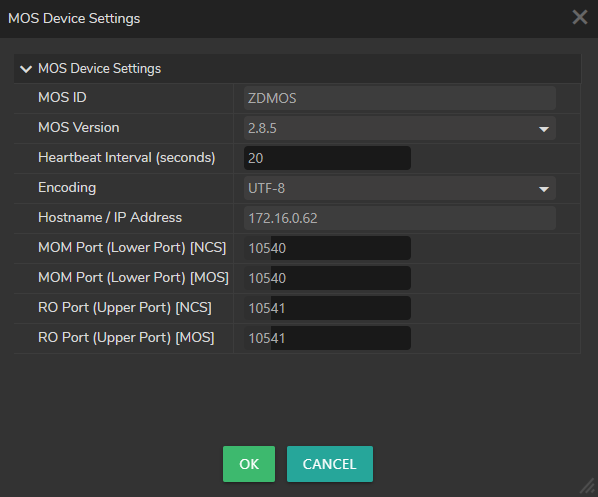
MOS Device Settings in RealityHub
Select the device from the NCS Devices area
Click on the MOS Device Settings button

MOS ID: REALITYHUBMOS is the default MOS ID. You can change it per your setup, as the example image above shows, or you can leave it as a default, but it must have the same with the mosID in the Octopus settings.
MOS Version: Select the MOS Version matching with the Octopus
Heartbeat Interval: The area you can define the frequency of heartbeat interval.
Encoding: Choose a multibyte encoding (UTF-8 or UCS-2BE) matching your workflow.
Hostname / IP Adress: IP address of the computer your RealityHub Server is installed.
The following two ports are designated MOS Protocol ports to communicate with the NCS automation.
MOM Port (Lower Port) [NCS] & [MOS]: Define a port number that matches with the Octopus Media Port
RO Port (Upper Port) [NCS] & [MOS]: Define a port number that matches with the Octopus Rundown Port
RealityHub uses Port 10540 and Port 10541 for communicating with NSC devices using MOS protocols as a default setup. You can change it depending on your setup.
There is a third port some systems use which is called Query Port, and its default value is 10542
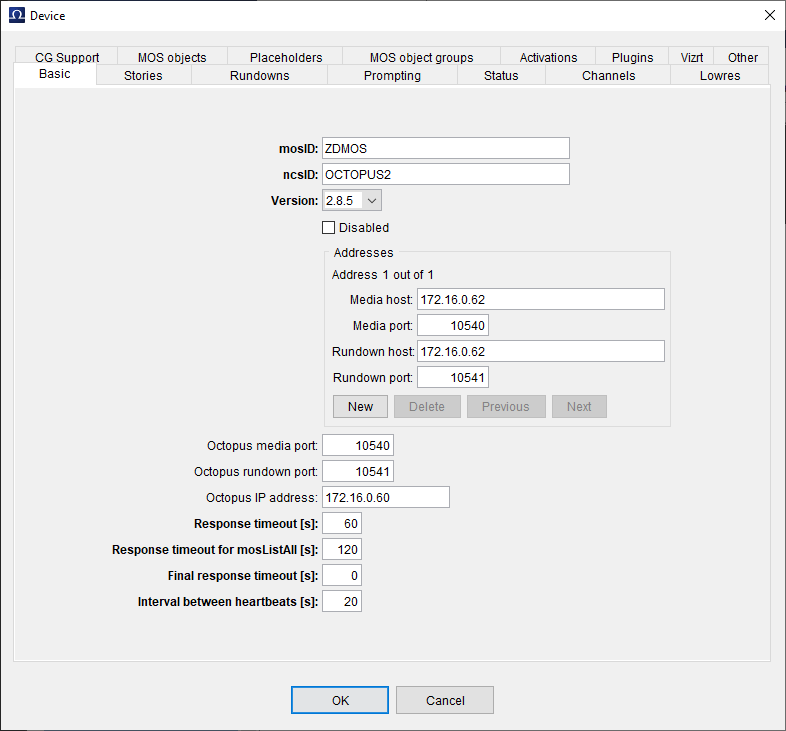
MOS Settings via Octopus
Please keep that in mind; every MOS Device Settings in the RealityHub must match the Octopus Settings.

Modify all the parameters to exact match with RealityHub MOS Device Settings.
Activating the ZD PLUGIN for Octopus
To establish a bridge between Octopus and the RealityHub, you must activate ZD Plugin. To do that:

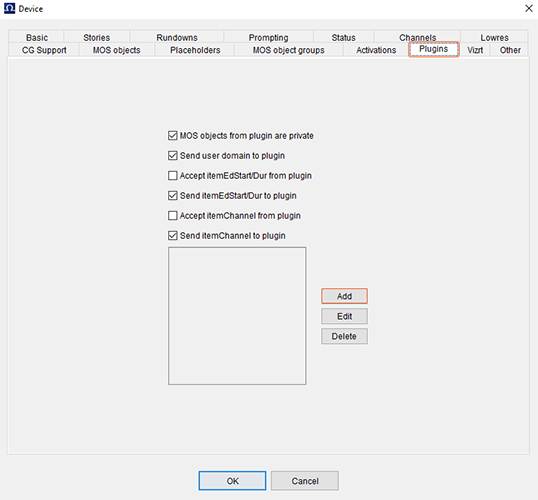
In your device settings:
Select Plugins
Click to Add button

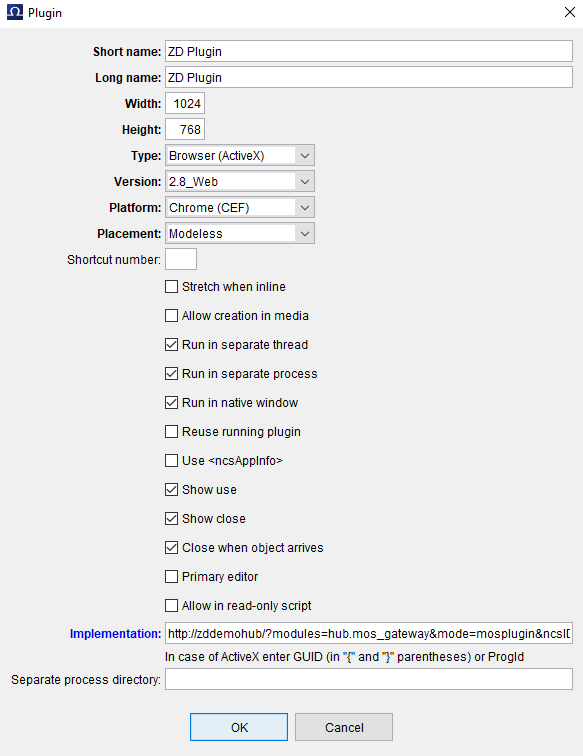
In the Plugin configuration window, fill the areas shown in the image above and click OK.
Note: Width and Height can be different based on your needs, such as 1920x1080 or similar.
The Implementation property on the image above is for illustrative purposes only.

You must define your RealityHub Server IP Adress in Implementation as following: http://<YOUR RealityHub SERVER IP ADRESS>/?modules=hub.mos_gateway&mode=mosplugin. Copy MOS Plug-in URL button also does the same jo as shown on the image above.