Before utilizing the Advanced Preview Monitor (APM), ensure that your Reality Engine scene (*.uproject) is launched and working in Configuration Mode. For more details, see Launcher
Launching Advanced Preview Monitor
Go to Main Menu > Windows > Nodegraph/Actions
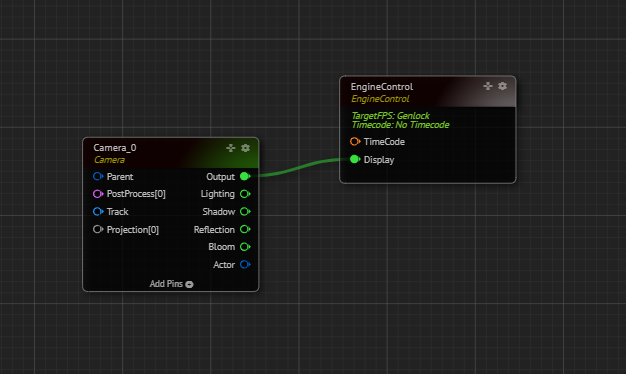
Create a CAMERA node
Connect CAMERA node’s OUTPUT pin toENGINECONTROL node’s DISPLAY pin
Move your mouse pointer over the OUTPUT pin of the CAMERA node and right-click
Go to Monitor 1, select the Channel - A
Using Advanced Preview Monitor in Multiview
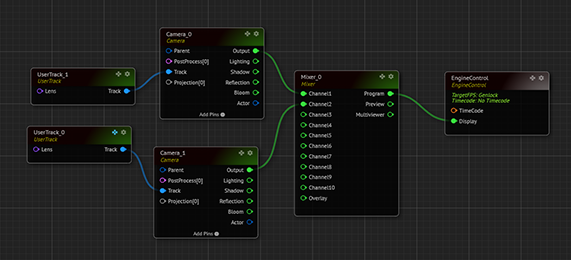
Add the following nodes to your Nodegraph:
One MIXER node from the Switcher Node Class
Two CAMERA nodes from the UE Camera Node Class
Two USERTRACK nodes from the Tracking Node Class
Make the following connections:
ENGINE CONTROL node’s DISPLAY input pin to MIXER node’s PROGRAM output pin
MIXER node’s CHANNEL1 input pin to CAMERA 0 node’s OUTPUT pin
MIXER node’s CHANNEL2 input pin to CAMERA 1 node’s OUTPUT pin
CAMERA 0 node’s TRACK input pin to USERTRACK 1 node’s TRACK pin
CAMERA 1 node’s TRACK input pin to USERTRACK 2 node’s TRACK pin
Next Step:
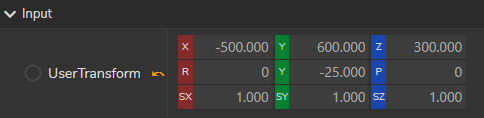
Select the USERTRACK 1 node
From the Properties panel, find the UserTransform property under the Input property category
Change the Y value from 0 to 600
Change the Z value from 100 to 300
Y (Yaw) value from 0 to -25
Now:
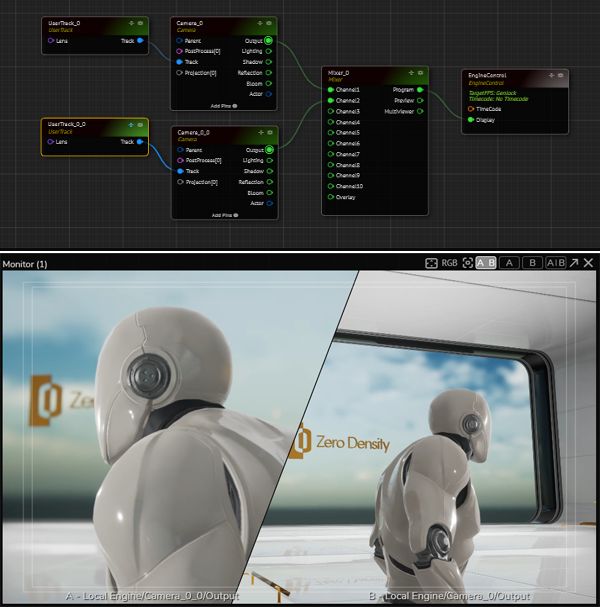
Go to CAMERA 0 node’s OUTPUT, right-click with your mouse, Monitoring - 1 and select the Channel - A
Go to CAMERA 1 node’s OUTPUT, right-click with your mouse, Monitoring - 2 and select the Channel - B
As shown in the image above, we can monitor two different CAMERA outputs in the same Advanced Preview Monitor window.