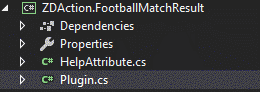
Real-time Data Driven Action Plugin
Let’s start to create our own Action Plugin and how to use JSON data in Reality Editor. We will start from creating Action Plugin. Before start you can check this link. How to create action builder plugin and how to use it. According to the Document, we need to create Class Library the project structure should be name for a plugin project is "ZDAction.Plugin.{Group}.{Name}". Plugin project requires two main classes. First one is Plugin and the second one is HelpAttribute.
HelpAttribute
using System;

namespace Plugin
{
    public class HelpAttribute : Attribute
    {
        public string Summary { get; set; }
        public string Author { get; set; }
        public string[] Returns { get; set; }
        public string[] Parameters { get; set; }
    }
}
Plugin
using Plugin;
using System;
using System.Text;

namespace ZDAction
{
    public class Plugin
    {
        [Help(Author = "ZeroDensity",
            Summary = "Returns Football match results for a specific date which are finished",
            Parameters = new[] { "API_KEY", "Date", "League" },
            Returns = new[] { "Json" })]

        public static string RawJSON(string API_KEY, string date, string League)
        {
            try
            {
                var webClient = new System.Net.WebClient();

                webClient.Headers.Set("X-Auth-Token", API_KEY);
                var url = "http://api.football-data.org/v2/competitions/" + League + "/matches?dateFrom=" + date + "&dateTo=" + date;
                webClient.Encoding = Encoding.UTF8;

                return webClient.DownloadString(url);
            }
            catch (Exception ex)
            {
                return ex.Message;
            }
        }
    }
}
For this example we just used free account and API_KEY from here. After writing your plugin you need to build your plugin and paste it into your plugin folder. If you don’t know where is your plugin folder you can access it from “C:\Program Files\Zero Density\Reality Control Applications\4.25” and check “ZDRealityActionBuilder.exe.config” with any text editor and you can check this part which is shown as below.

After that you can open your Action Builder in Shipping Mode or you can access it directly under “C:\Program Files\Zero Density\Reality Control Applications\4.25” and open ZDRealityActionBuilder.exe. Let’s open Action Builder and add some components to use it. MatchResultPlugin requires 3 parameter but totally we will create 4 parameter. Fourth one will keep Return data.

You will get API_KEY from here when you get new account. Date is getting match result according to date.

If you check API request url, you will see that you can able to write two different date. If you want, you can get match result between two specific date but for our example we just designed according to one date. For the League parameter which is the last one, just let you get results from specific Competition like Premier League.
If you understand what is the parameters are doing, let's add it to Action Builder.
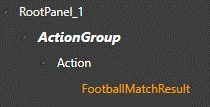
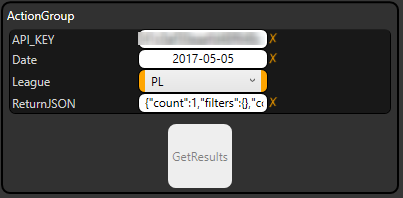
Add an action group.
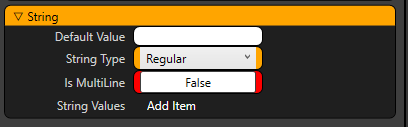
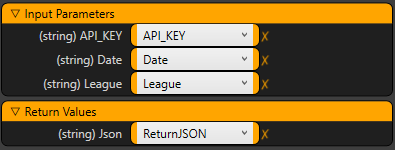
Add four string parameter which we mentioned above. (Add string parameters to Action Group)
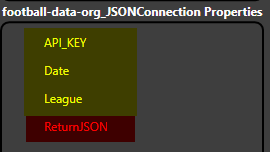
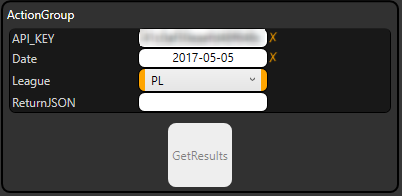
First 3 parameter which are shown with yellow color for Plugin and last one is for the keeping return data.
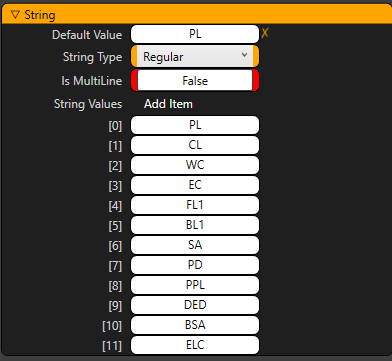
For League parameter, we will add some Competition Code like PL for Premier League.
So, as we mentioned above, we will use free account for here and according to football-data we can access 12 different competition. You can check from here. So, lets add some league code to our League parameter.
Just click "Add Item" and fill it.
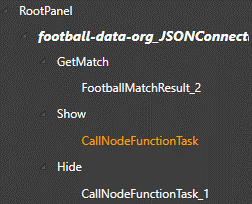
After these steps we can start to create buttons as Action. Our first Action will get data from here, with this action we will keep our return data with a variable.
Create Action.
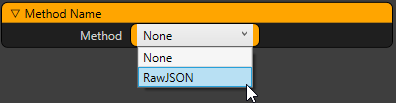
Add FootballMatchResult Plugin from Plugin section. You can also find another plugin which is created for users as a sample.

If you click your plugin you will see the available functions from Plugin. For FootbalMatchResult plugin there is only one function which name is RawJSON. Let’s use it.
After using function there are some new categories and properties will appear below that category where you choose your function. You can also bind your property to your function inputs.

If you did everything right, you will see some return value on your ReturnJSON variable when you execute your action.
Date format should be YYYY-MM-DD.
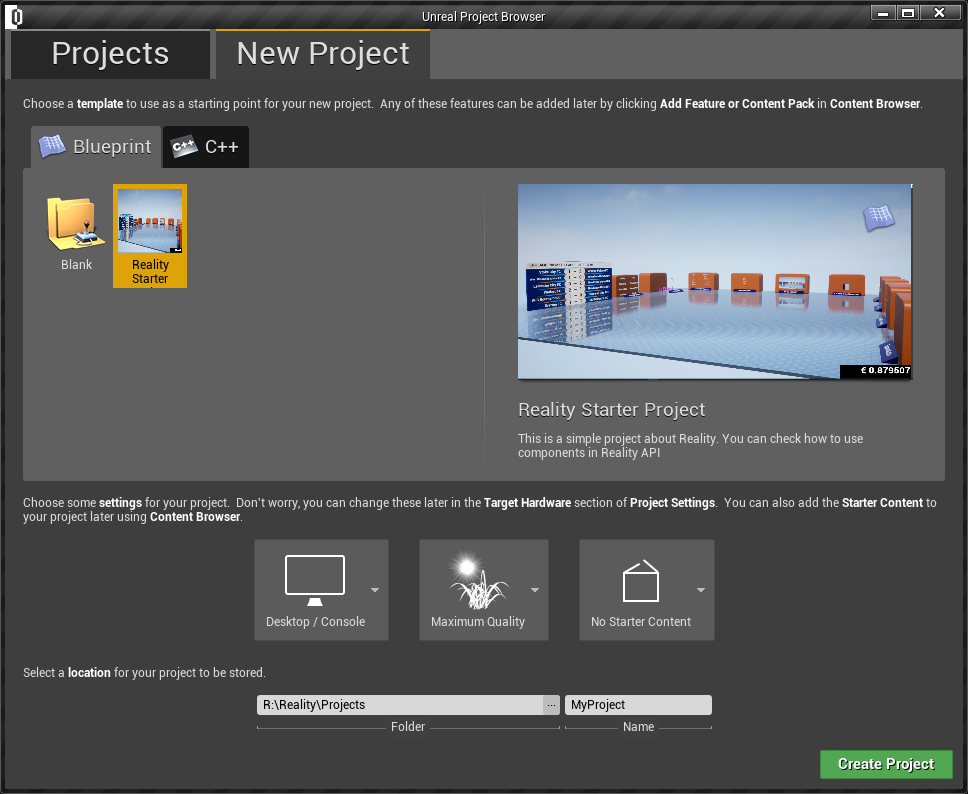
So that ReturnJSON includes some data which finished match from Premier League. After this part we need to parse that value in Reality Editor. If you create a project with Reality Starter Template, you can access and you can check all graphics and blueprints. Just open the Editor then come to New Project and choose RealityStarterProject.
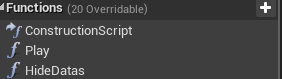
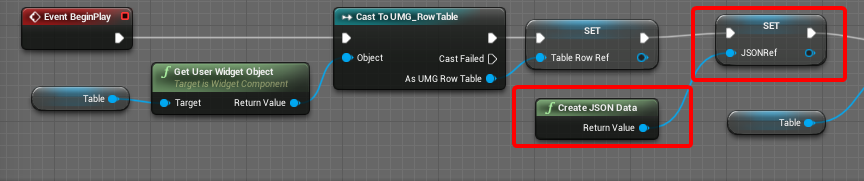
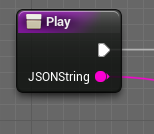
Now you have everything for an example. Everything about example just located under Content/JSONScoreBoard folder. Let's start which function works for what. There are 3 different Widget Blueprint which works only for showing animation graphics and data. Open BP_JSONTable and check how it is works. This BP has ZDActor and Widget Component. We set UMG_RowTable to Widget component. We can access all variable inside widget component via widget component reference. There are two different functions. One of them is Play and the other one is HideDatas.
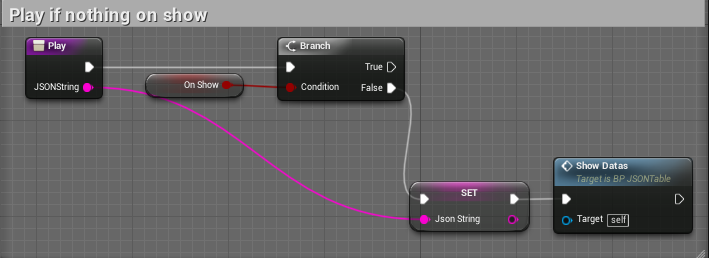
We are checking if there’s nothing on the show just set our data which comes from Action Builder. JsonString variable which inside BP_JSONTable is filling by ActionBuilder. There is one more Event which execute when JSONString data is changed. This event mechanism also developed by Reality developers. So, whenever JSONString data is changed that event works which shown in below image.

Clear Table events just clear all table data. This is works before we start to fill our table. Our Create row events just prepare row data and parse the JSON data. We need to focus how to parse JSONData from string value because other functions and events just provide playing animation, updating data and just checking some conditions.
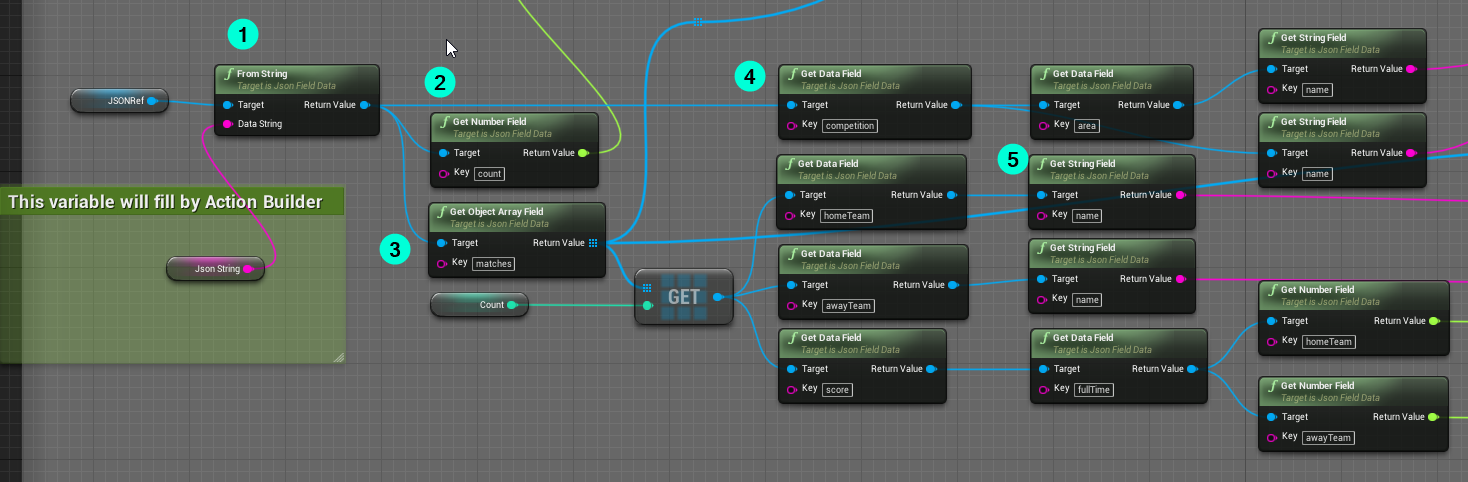
As we mentioned our JSONString variable filled by ActionBuilder. Now we can parse it with FromString node. But we need to use this node with JSONFieldDataObjectReference variable. If you want to create this variable just add CreateJSONData node and promote a variable. Now we can use our reference with other JSON nodes like FromString. Once if you done this you can access all the JSON values with your key. If you check above picture we are getting value with a specific key.
Get Number Field node is works for getting some value which returns float value.
This node returns Object Array from your
JSON Data. You can access any array with Get node.
Get Data field is let you to getting value from your
JSON Data. Please check example JSON value which include DataField. If you check example which shown in below, you can access competition Data Field with that node.
{"count":1,"filters":{},"competition":{"id":2021,"area":{"id":2072,"name":"England"},"name":"Premier League","code":"PL","plan":"TIER_ONE","lastUpdated":"2019-05-12T20:05:45Z"}
This node is let you to get your string value with your key.
Other blueprint scripts just for playing animations, updating values and checking some condition. Our priority should understand how we parse JSON value From String. Our another function is the HidesData, just hiding the table with animation. Now we can open ActionBuilder and add two more Action For those two functions. So, lets add two more action for Show and hide Data functions.
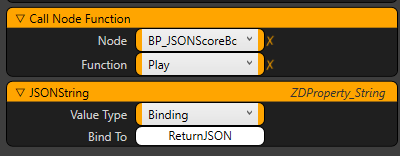
After adding two more actions we will use CallNodeFunctionTask to execute functions. After the adding process, you can check which nodes are available from node graph and choose your desired function. In this example if you check Play function you will see there’s also variable which you can set some value to there. This is come from Blueprint Function. Our ActionBuilder also detect your function parameter.
After those steps lets execute our plugin with graphics. If you want to try what we create please download these two files.
One of them is rgraph, will show to you directly ScoreBoardTable and the other one is .raction file that you can execute Action Plugin with actions.
Open a project which you create with RealtyStarterTemplate.
Play it.
Load ZDStarterGraph.rgraph.
Open ActionBuilder and load ZDStarter.raction file.
Create an account from link and get API key and use for the API_KEY text block.
Click GetMatch and check if you have ReturnJSON value then you can execute Show and Hide function.