Tracking Calibration and Fine Tuning
Understanding the Axes of Reality
Different tracking devices offer different approaches to the system. Here you can see the axes of Reality Suite:
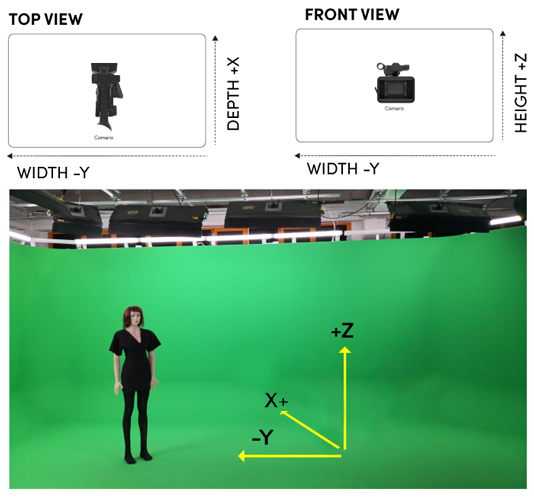
On all TRANSFORM properties of nodes, you should see that the values are changing according to this axes setup. And remember that these values are by default and especially X and Y axis values need to be properly determined if you are looking at a different angle and a different Pan value in the set.
Depth: The X-axis of Reality
Width: The Y-axis of Reality
Height: The Z-axis of Reality

Choosing the Right Tracking Method
Whether we want to achieve a Virtual Studio or an Augmented Reality studio, we need to know where our real-world camera sensor is. Not only the position, but we also need to know the pan, till, roll values which are listed below:
Icon | Known as | in Reality |
|---|---|---|
 | Roll | Roll |
 | Yaw | Pan |
 | Pitch | Tilt |
In addition to the position, pan, tilt and roll values we need to know the Field of View and the Distortion of the lens. This is called camera tracking.
Generally, there are 2 main methods of camera tracking:
Mechanical sensor tracking
Image tracking
But whatever the tracking method is, the tracking device transfers the data from serial port or network or both.
Tracking System Lens Calibration
Some tracking systems supply also the lens Field of View data with the protocol. Such tracking system vendors calibrate the lens data themselves, so Reality cannot be involved in this lens calibration process. But if a tracking protocol doesn’t supply final lens data, Reality can use zoom/focus encoder values coming through the tracking protocol and supply its lens calibration values.
Data coming from the mechanical encoders are integer values. Reality tracking nodes map these raw encoder values to floating point between 0 and 1.
If you don’t have a tracking device available during your tests, you can still use the USERTRACK node for sending test tracking data to other nodes.
Lens Center Shift
Remember that Lens Center Shift must be applied if your tracking solution provider does not provide the lens center shift calibration or either even if they provide, you would want to override these values.
Whenever a lens is mounted onto a camera body, the center of the lens cannot be aligned perfectly to the center of the image sensor. As a result, during zoom in/out the camera shifts the image a few pixels left/right and up/down. In order to compensate for this mechanical error, in later steps we will find this shift amount using trial and error method.

Calibrating Lens Center Shift
This shift calibration is specific to the lens and camera body combination. Since it is very dependent to mechanical conditions, it can change whenever you use another camera body, even using exactly the same camera model.
After locking the pan/tilt of the camera;
Zoom in to maximum level with the lens centering on physical objects.
Put a crosshair image overlay on top of the camera image. You can download the HD version (1920*1080) here. and UHD version (3840*2160) here,
Type in small values to Center Shift after you zoom out.
Zoom in and zoom out again while iterating the shift values until the image doesn’t shift.
To add an overlay image on top of the camera image, follow the steps below:
Connect the CAMERA node’s OUTPUT pin to MIXER node’s CHANNEL1 input pin
Right-click on the nodegraph and go to Create > Media I/O > MediaInput to create a MEDIAINPUT node.
Change the MAXSIZE of MEDIAINPUT node to 3840 and 2160 if you are using a UHD image or leave it by default which is:

Connect the OUTPUT pin of the MEDIAINPUT node to the OVERLAY pin of the MIXER node.
You will see that the crosshair image is overlayed on the image as below:

Setting the Right Tracking Parameters
Setting the right tracking parameters will prevent sliding between real ground and virtual ground. To achieve this, follow the steps below:
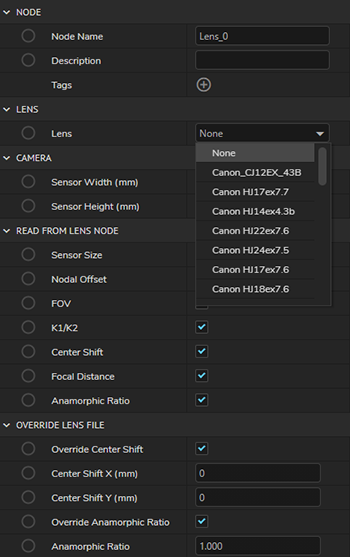
(FOR SYSTEMS WITH STYPE) After Stype tracking calibration, you might choose not to have a LENS node in your nodegraph. If you add a LENS node on your nodegraph, disable all the properties of the Lens node apart from FOCAL DISTANCE. The LENS node should look like this: *** if you are going to use DOF you need lens node, make sure you add this node****

(FOR SYSTEMS WITH STYPE) If you have a LENS node in your nodegraph and the LENS list does not include the lens you are using, please choose the LENS which has the closest FOCAL DISTANCE to the lens you have:
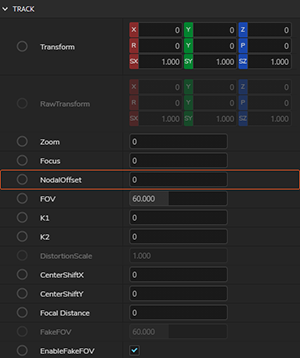
(FOR SYSTEMS WITH STYPE) Go to STYPE node on the nodegraph and make sure that NODAL OFFSET is 0 as shown below:
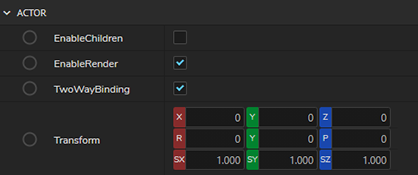
Check all CUSTOM ACTOR and TRACK MODIFIER nodes and make sure that the ROLL and TILT values are zero as shown below:
See that TRACK pin of the CYCLORAMA node is connected to the TRACK pin of the STYPE node directly. The rest of the nodes' TRACK pins should be connected to the TRACK MODIFIER as shown below:

If the lens has been taken out and put back which means there is a physical change in the location of the lens, the Lens Center Shift Calibration must be done again which has explained above.
Check if the Device Mapping (DEVICE TRANSFORM and CAMERA TRANSFORM) parameters of tracking system are set to zero (0).

If you are using a PTZ head, you might need to modifyDEVICE TRANSFORMof the track node regarding to the axes of Reality by clicking here. Consult your tracking solutions provider for measurements and transform values related to the zero pivot point of the camera and enter these values to DEVICE TRANSFORMas shown below. Remember that especially the accuracy of PTZ values which are RYP values in Reality are very important for seamless calibration
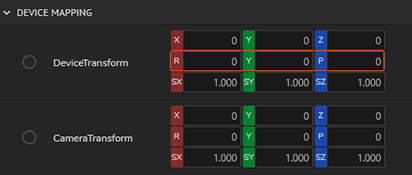
In Reality Editor, check if the floor offset is higher than zero (0).
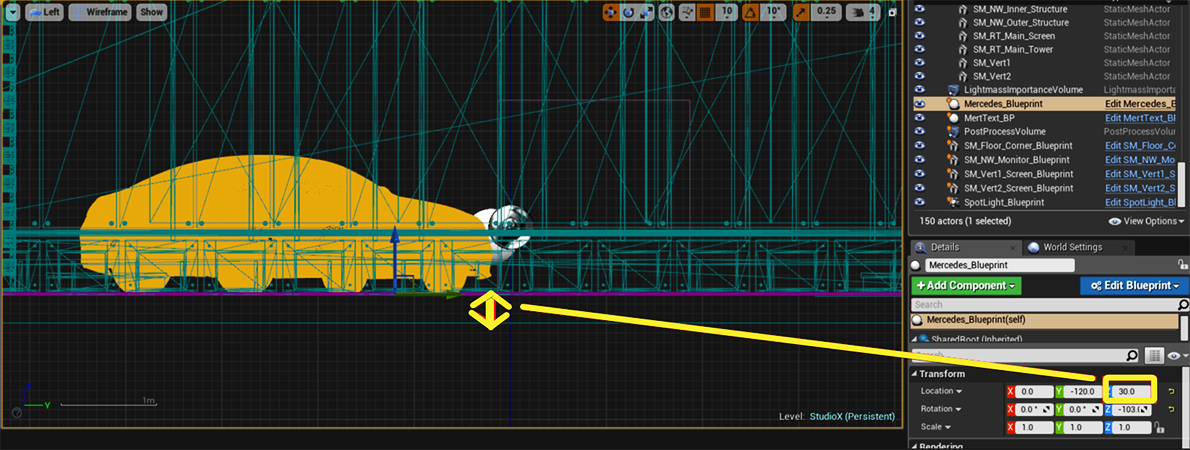
For example, in this project, floor of the set we use is 30cm higher than Z-axis. In this case, the BOTTOM of the PROJECTION CUBE in setup won’t be visible as shown below:
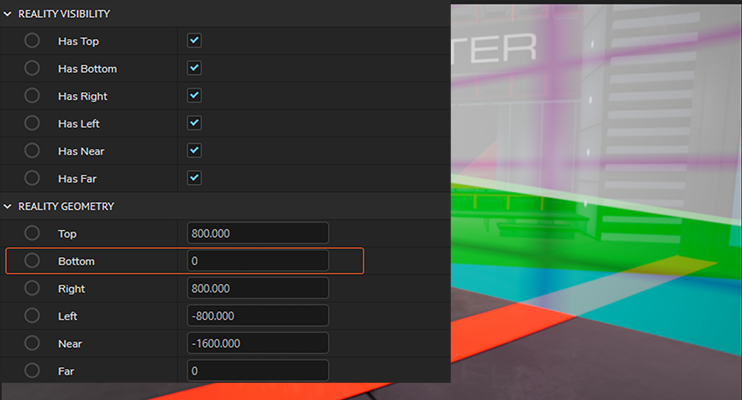
The Bottom of the Projection Cube is not visible when it is set to 0.
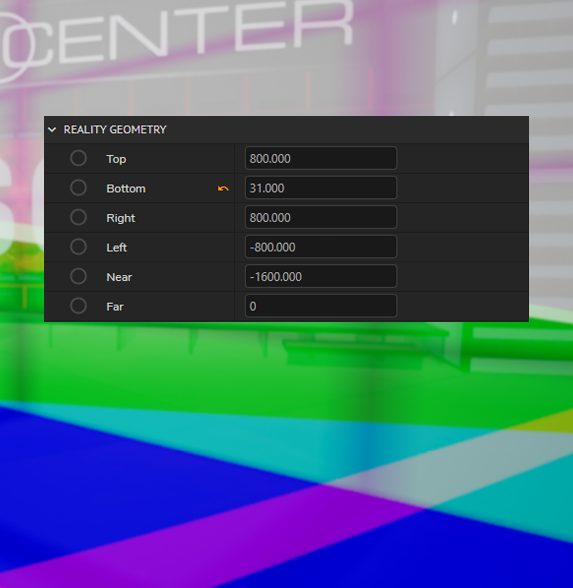
The Bottom of the Projection Cube is conflicting with the graphics when it is set to 30 and is fully visible when it is set to 31. What that means is, graphics are roughly 30cm higher than z-axis. The right way to make this setup work is taking the graphics 31 cm down by changing the LOCAL TRANSFORM of our CUSTOM ACTOR by 31 cm.
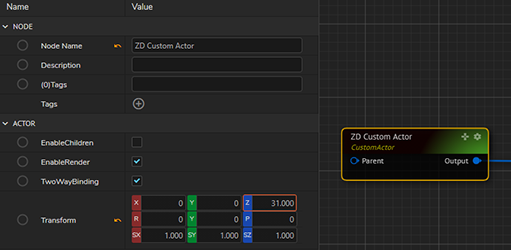
Setting the Z-Transform parameter of the Custom Actors. After setting these parameters correctly, the projects tracking should work fine. Remember that all the CUSTOM ACTORs connected to the TRACK MODIFIER should have the same Z TRANSFORM value. Don’t forget to check these parameters if any of the CUSTOM ACTOR or TRACK MODIFIER are changed.
Mapping Pan/Tilt/Roll Coordinates
There might be situation where your raw tracking data might provide different data coordinates for Pan, Tilt and Roll. As an example, Reality may receive Pan data instead of Tilt and Tilt instead of Pan on the Tracking node. In order to swap these coordinates, in Reality Control application, on all the tracking nodes (such as FreeD, MoSys, Stype, UserTrack etc.), there is a new property option PAN/TILT/ROLL under Transform Mapping section where you can use various mapping methods.
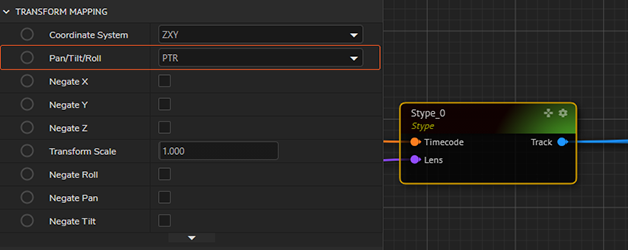
The 6 possible permutation options are available which can be selected for mapping as per your tracking data sent to Reality Engine. In the below example, you can see the behavior of PTR and TPR mapping. Pan and Tilt coordinates are swapped.
USERTRACK node is used to show the behavior.
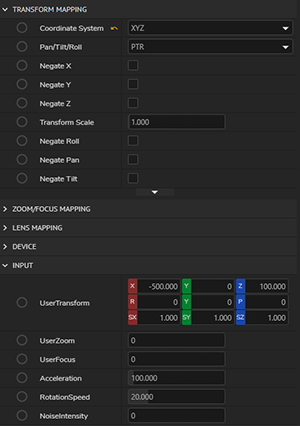
Terminology of the coordinates for Pan/Tilt/Roll:
Coordinate | Reality Property | Editor Terminology |
|---|---|---|
P (Pan) | Y | Yaw |
T (Tilt) | P | Pitch |
R (Roll) | R | Roll |